
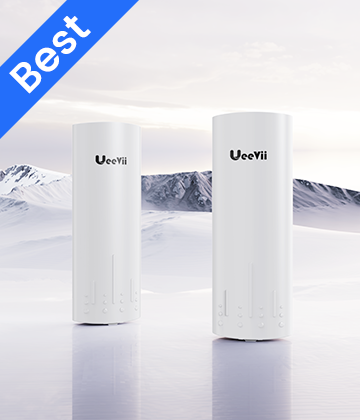


UeeVii
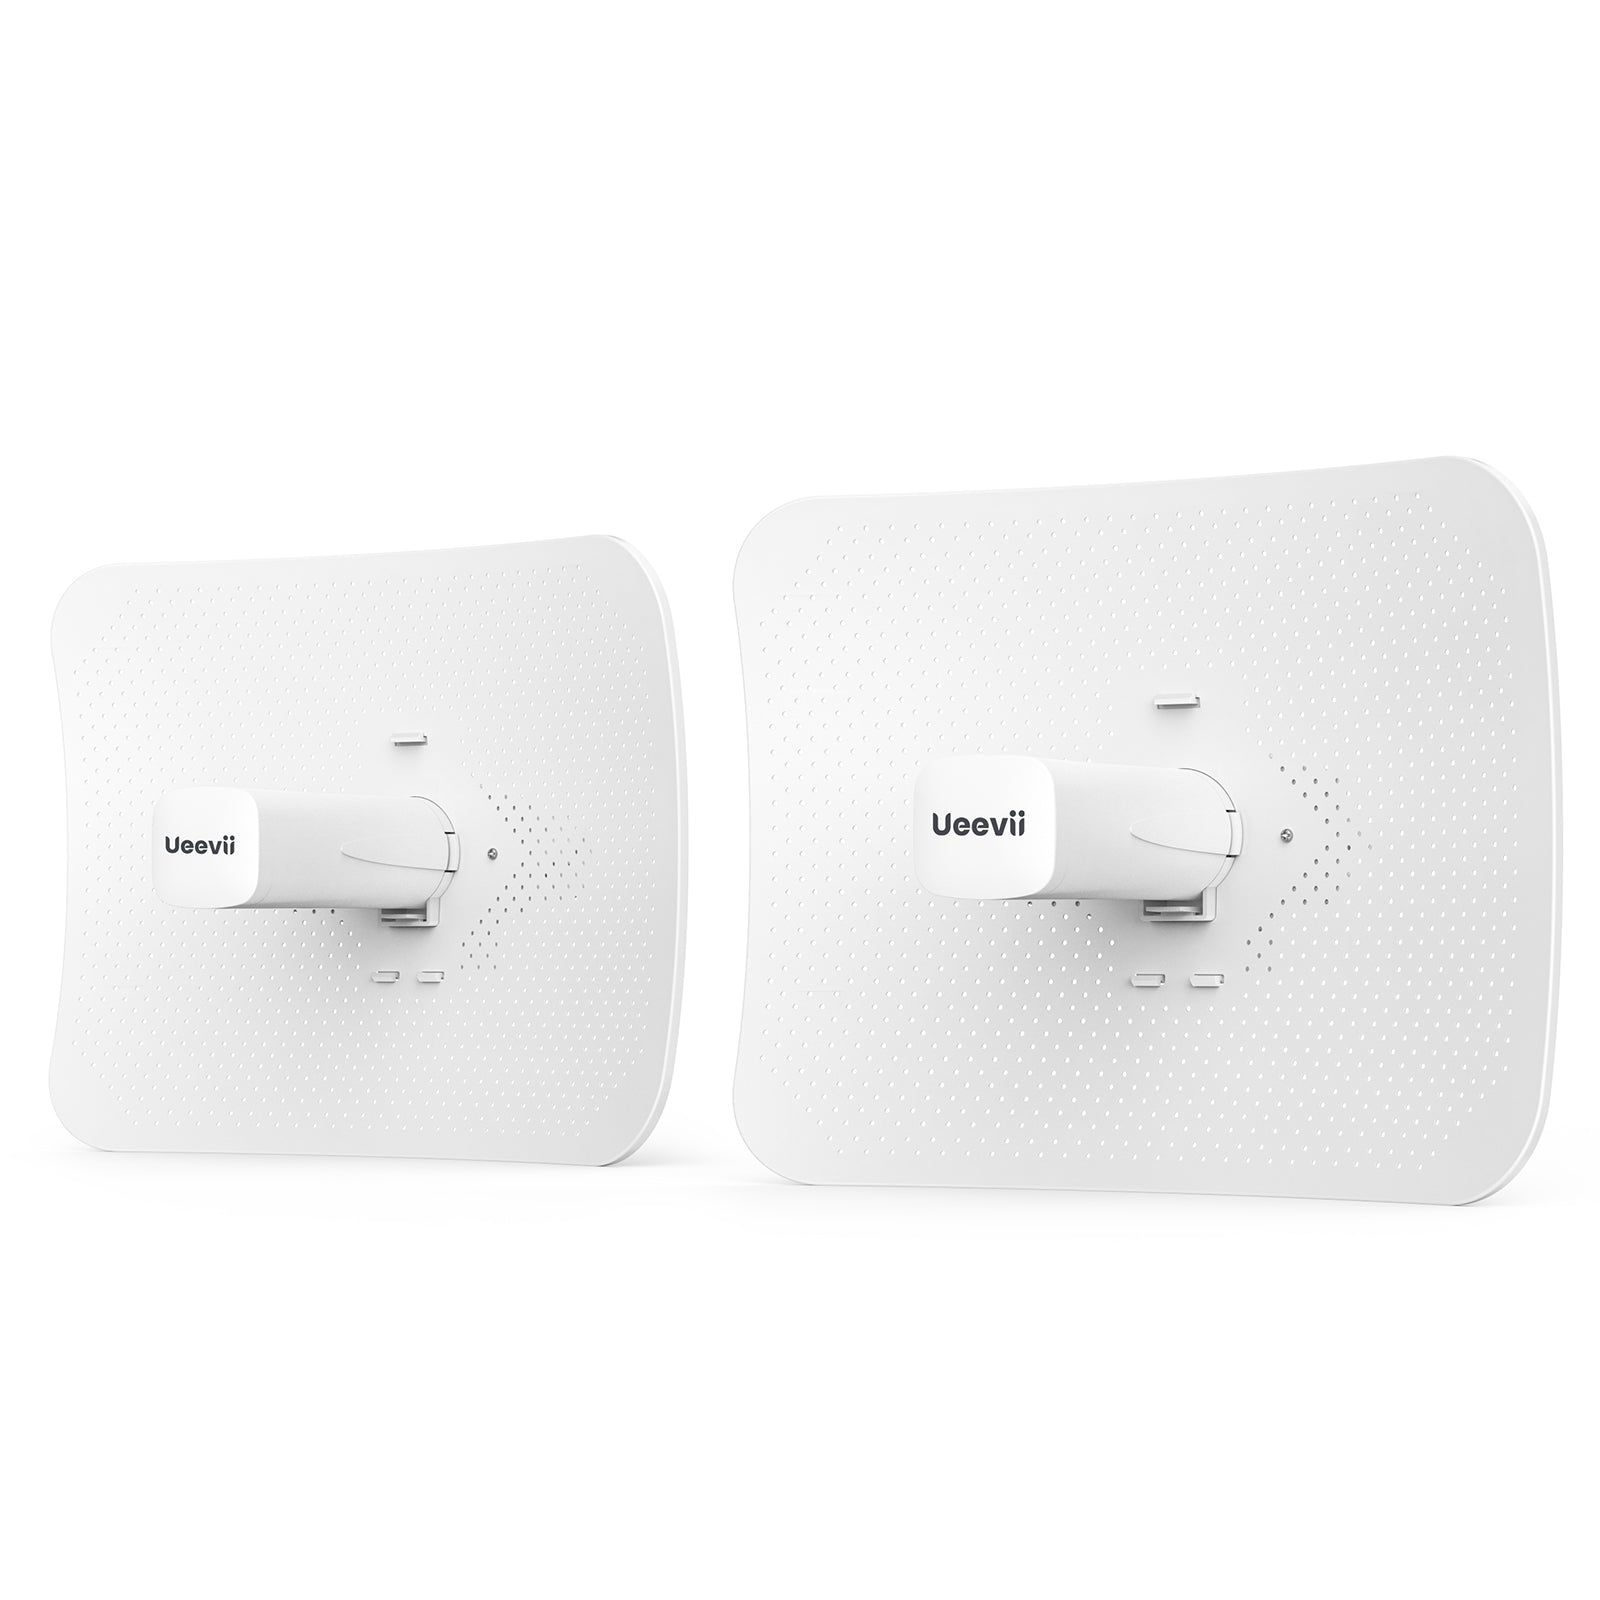
UeeVii CPE452 Point to Point Long Range Outdoor Wireless Bridge,2-Pack
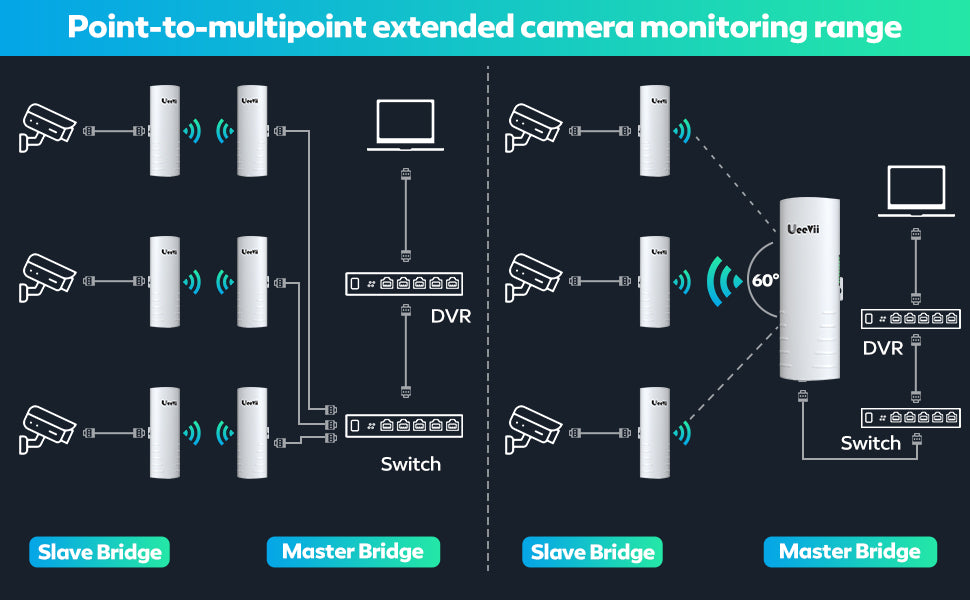
- Point-to-point and point-to-multi-point wireless connections.
- A maximum network speed of 100Mbps.
- Transmission distance up to 3km(Barrier-free)
- IP65 Level weatherproof shell
- Support PoE power supply (50 meters)
Shipping & Returns
1. Ship the goods immediately after confirming the order.
2. 30-day money-back guarantee for any reason
3. 12-month warranty for quality-related issues
4. Lifetime free technical support service
5. We take care of all quality-related issues with a REPLACEMENT.
6. Reminder: Be sure to use your product as directed.
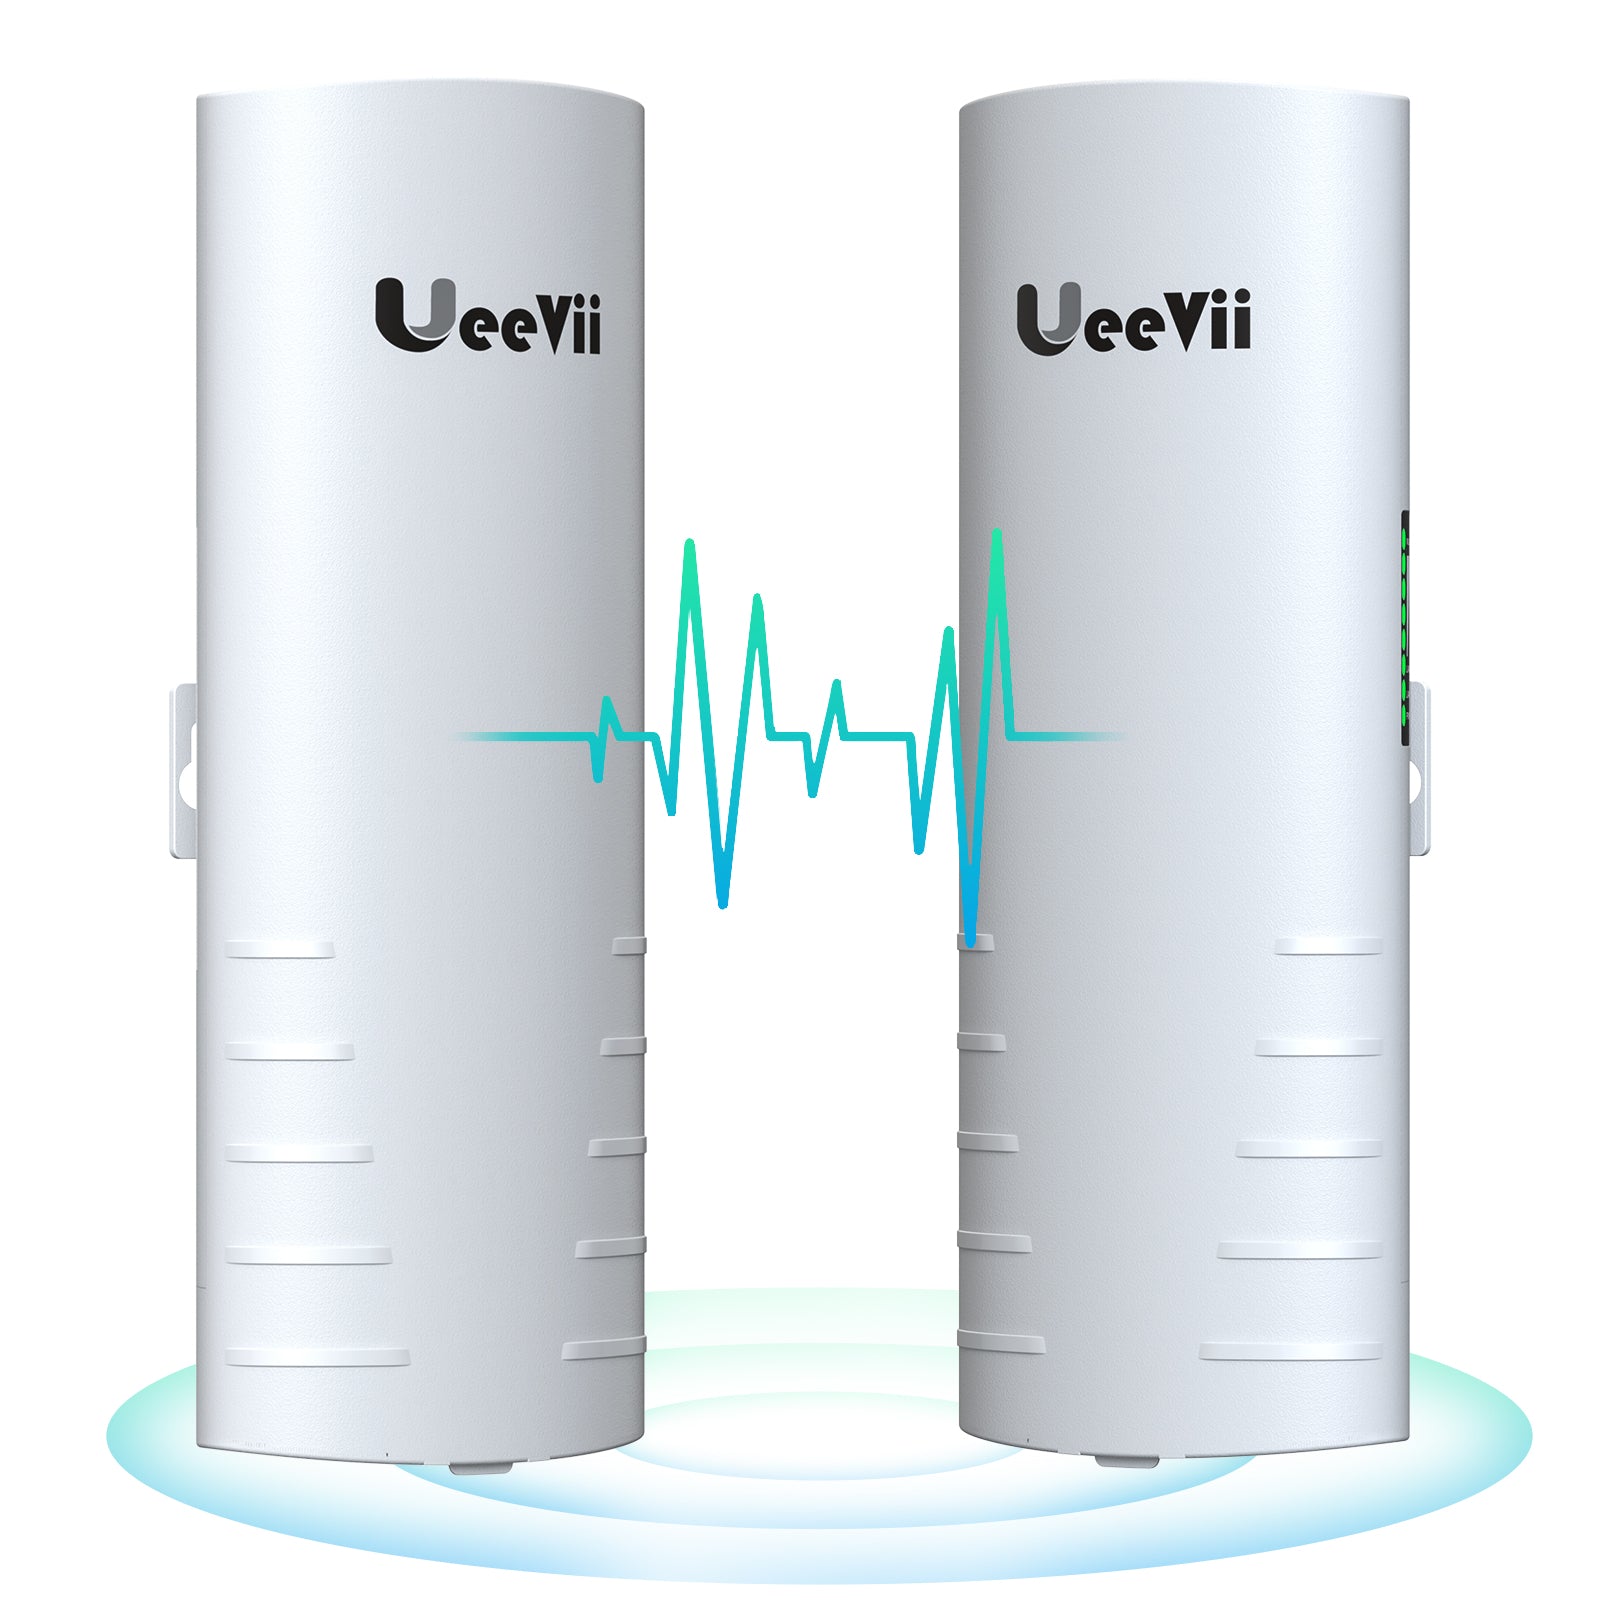
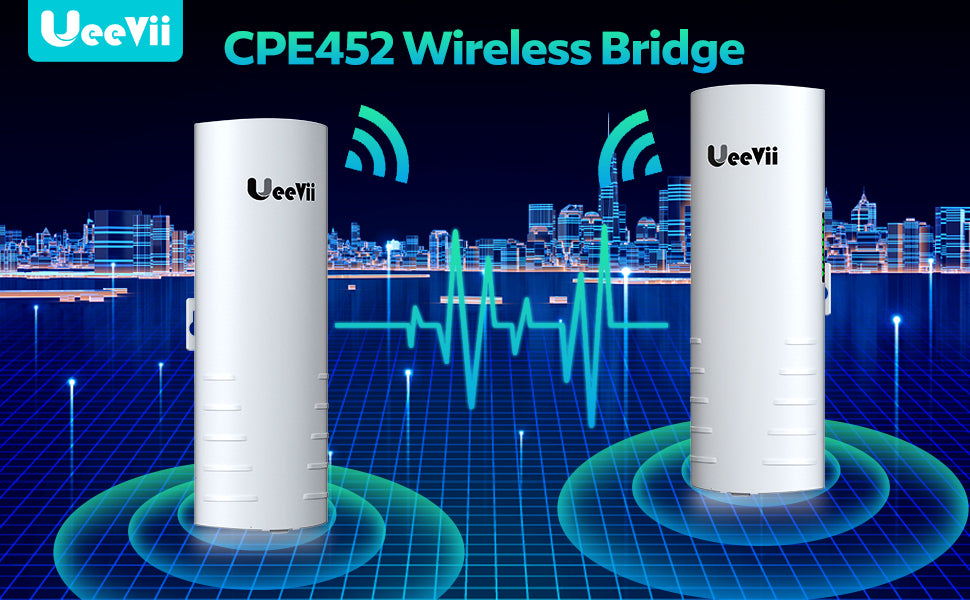
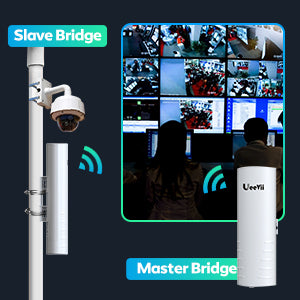
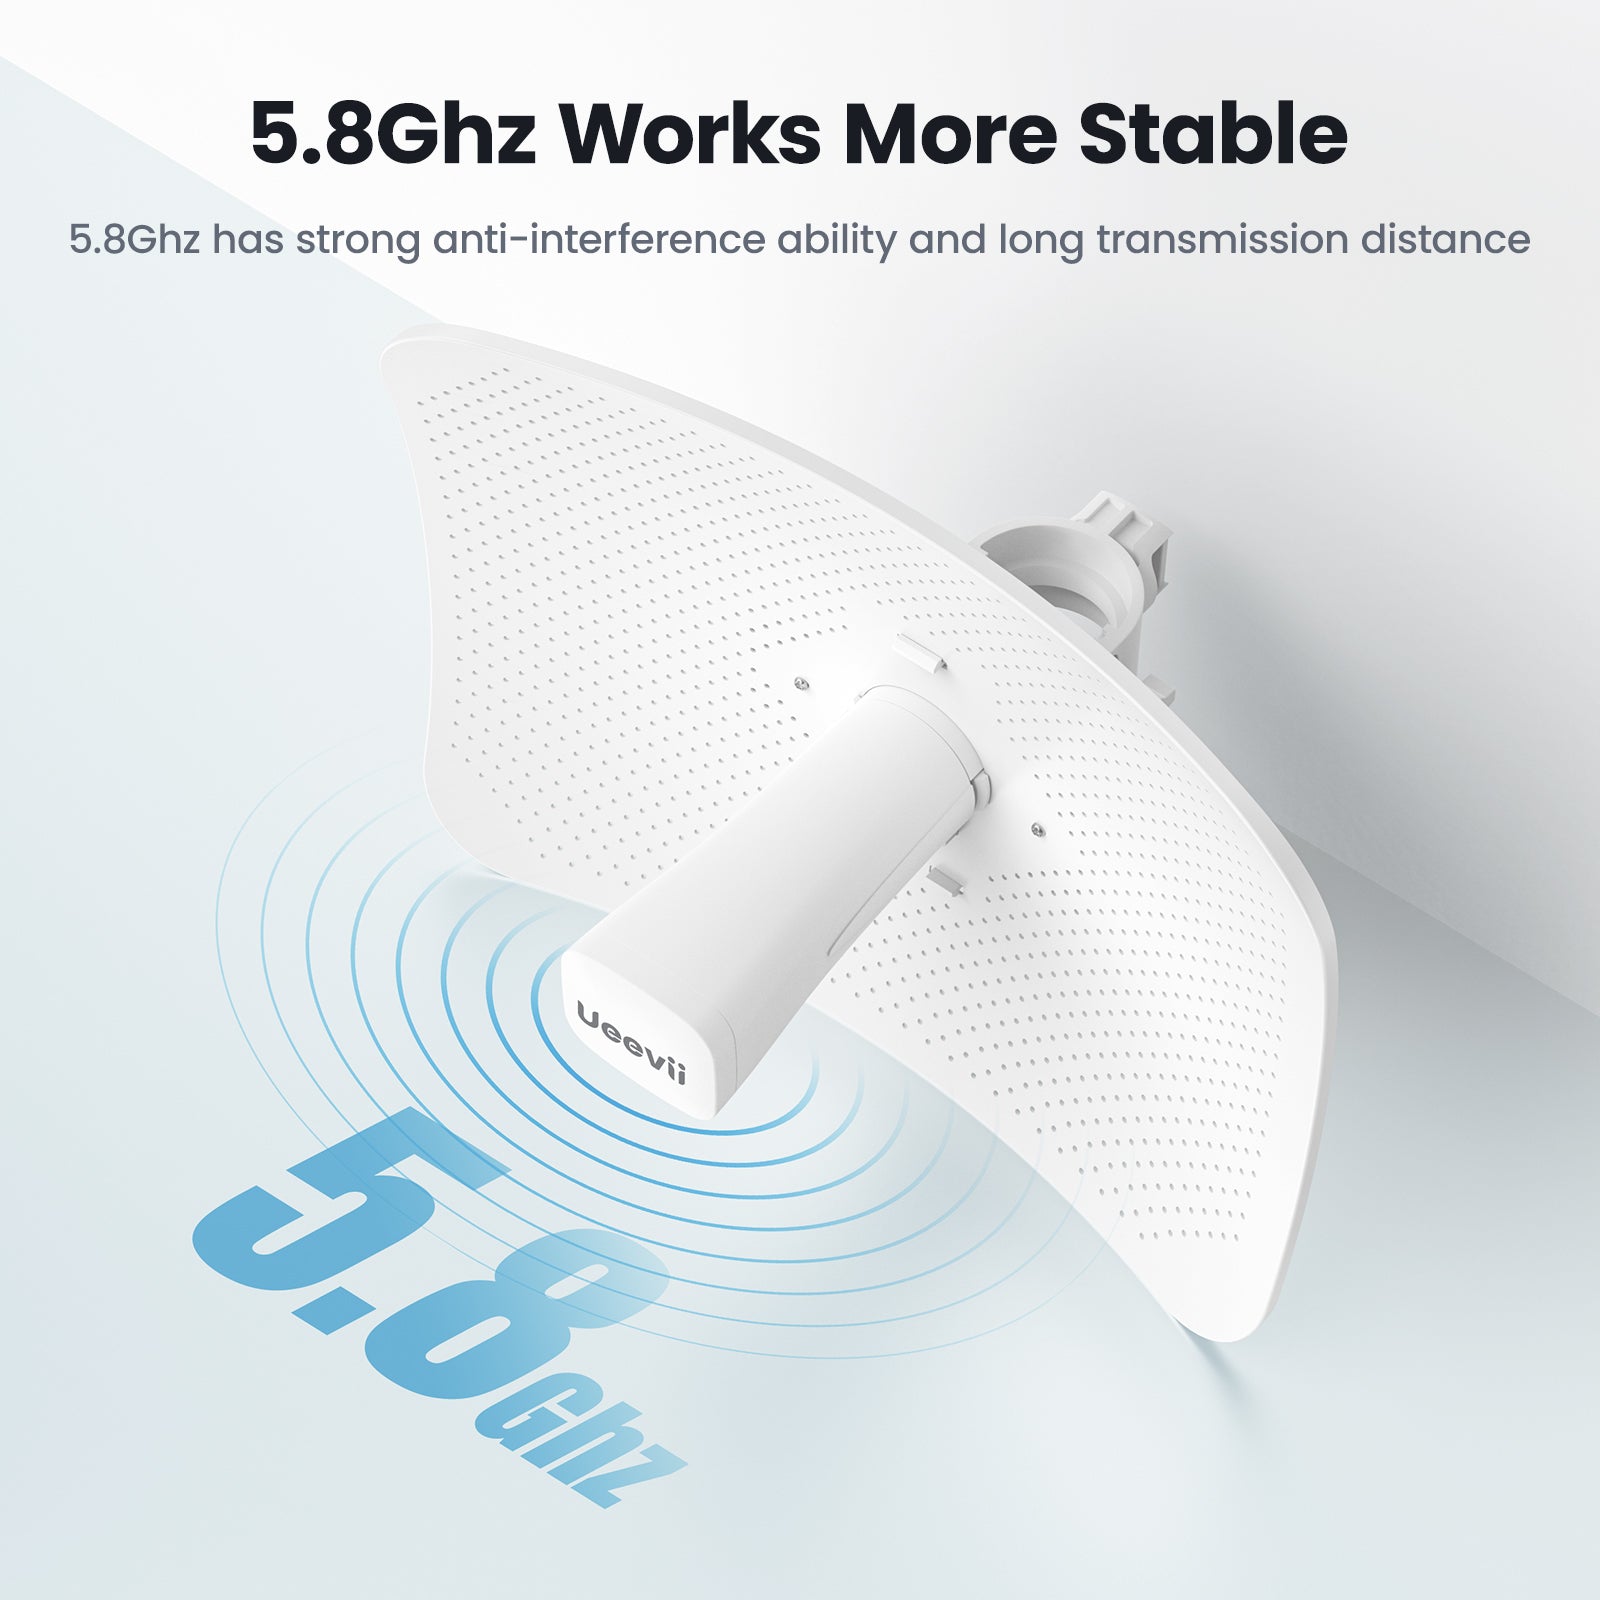
UeeVii CPE-452 is an outdoor high power and 5.8G high-performance wireless bridge, that supports point to point and point to Multi-Point wireless connections. Pairing can be done by dialing without having to access the GUI, making the long-range wireless coverage, data transmission, and wireless monitoring simple and professional, and saving much human work and cost.
CPE-452 WiFi bridge built-in 14Dbi high-gain antenna enables the transmission rate between 2 wireless bridges to reach 300Mbps, the highest wire network speed that can be achieved max is 100Mbps. To achieve the bridge function, one needs to act as a receiver and the other one as a transmitter.
Point to point wireless bridge can automatically power adjustment to adapt to environmental changes, ensuring smooth video regardless of ultra-close distance, transmission distance up to 3km(Barrier-free), actual application distance should be less than 3KM. Trees will not block the transmission speed of the point-to-point internet wireless bridge, suitable for shop warehouses or garages next to your house.
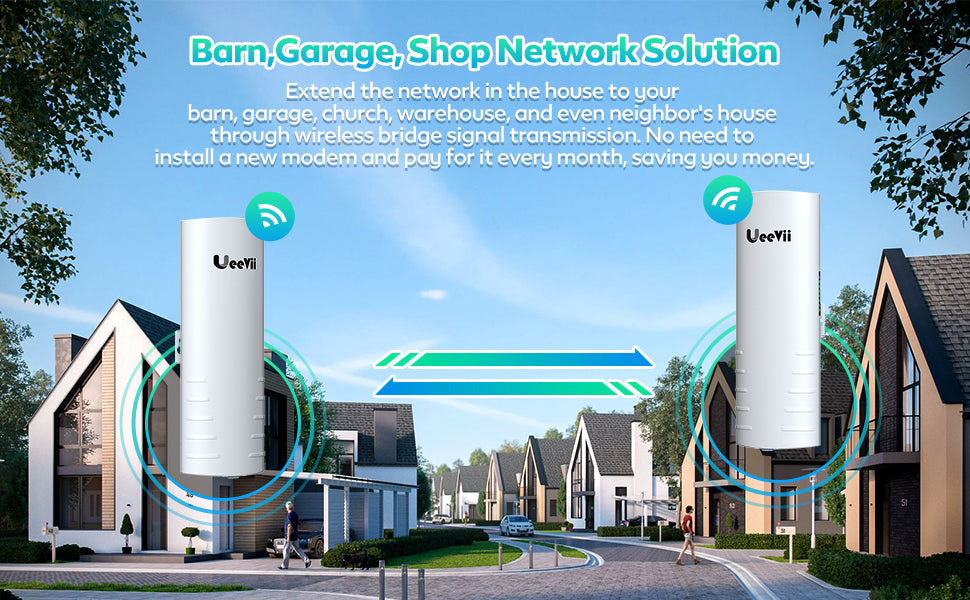
Point-to-point bridge easily helps you expand the network range to the second building(barn, shop, warehouses, garages), or wireless extend the IP camera monitoring range. IP65 Level weatherproof shell that ensures continued operation in harsh outdoor environments, very suitable for outdoor use, with rain, dust, and antifreeze characteristics.
Support PoE power supply (50 meters) power supply, easy to install, and save cost, and compliance with 5.8GHz IEEE 802.11a, IEEE 802.11n standard, support CSMA/CA, CSMA/CD, TCP/IP, PPPoE, DHCP, ICMP, NAT protocol. FCC ID: 2A6EJ-CPE450
Wireless Bridge Application Case
We have a second building that is about 150' from our main building and needed stable internet for both employees and security systems. I tried reaching it with our mesh routers, but even placing one on an outside wall wouldn't supply a stable signal. We could have installed a second modem/router but that would add hundreds to our initial install and monthly costs. Installing this bridge has offered a stable signal and wiring it into a mesh system, it has allowed us to expand our net throughout the second building.
How to Access and Setting the Wireless Bridge CPE Through Computer Access:
- Step 1. Use a PoE adapter to power the wireless bridge through a network cable. Pay attention to the "PoE" and "LAN" ports marked on the PoE adapter, and power is supplied by POE instead of a DC power interface.
- Step 2. Use a network cable to connect the CPE "LAN" port, connect the network cable other ends to the PoE Adapter "POE" port, use another network cable to connect to the "LAN" port of the PoE adapter, and connect the other end of the network cable to the computer's "LAN" port.
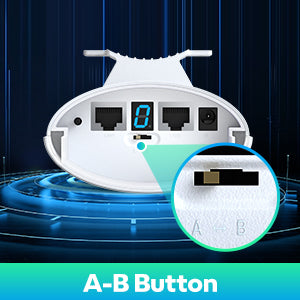
- Step 3. Find the number of the Wireless Bridge CPE digital display tube. For example, the number is 1 and the CEP is the A master bridge, then the IP of this CPE is 192.168.255.101; if the CPE is the B slave bridge, then the IP address of the CPE is 192.168.255.201.(There is a table corresponding to a number and IP in the manual)
- Step 4. Very important step: Modify your computer's IP address, change your computer's IP address to 192.168.255.xxx(192.168.255.xxx cannot be the same as the IP of the CPE), make your computer's IP and the bridge's IP address be on the same network segment so that you can access them. Please refer to the manual to modify the computer IP address step or Google searches how to modify the computer IP address, it is very simple.
- Step 5. After you modify your computer's IP address, you open the computer browser and enter the IP address of the wireless bridge to access. For example, enter 192.168.255.101 to access.
- Step 6. Enter the account password "admin/admin" to access, and set it after successful access.
Lane Monitoring Application
Display your courtyard camera, garage camera, and driveway camera images in the monitoring room wirelessly, without digging and burying lines, destroying the road, and saving costs.
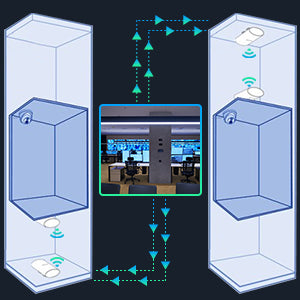
Elevator Monitoring Application
Using a wireless bridge to transmit monitoring signals in elevator monitoring can effectively avoid cable damage and obtain stable monitoring images. Wireless bridges are especially important in large projects, where they can be quickly deployed and easily dismantled for reuse.
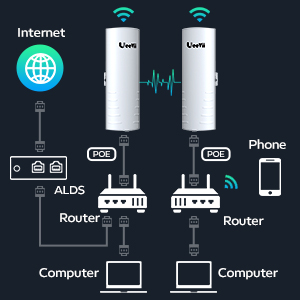
Network Extension Application
Extend the network in the house to your barn, garage, church, warehouse, even neighbor's house through wireless bridge signal transmission. No need to install a new modem and pay for it every month, saving you money.
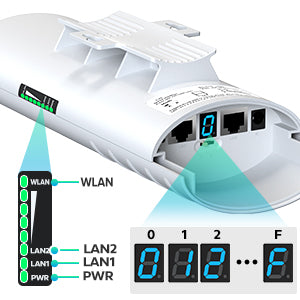
Helpful Indicator Lights
Change the characters of the digital tube at the bottom of the wireless bridge to modify the pairing signal channel. The steady light state indicates that it is working, and the blinking state indicates that it is being set. The lights on the sideshow the power and LAN connection status, and the signal lights indicate the signal strength of the paired 2 bridges.
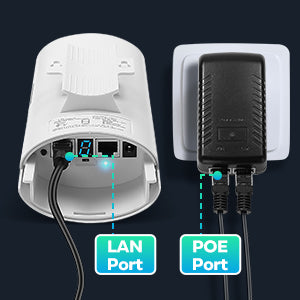
Dual LAN/PoE Port
Wireless bridge has 2 100Mbps RJ45 ports, both of which can accept 24V PoE power supply, and the CAT 5e network cable can be used as a power cable to supply power and transmit data. DC power supply is not recommended. The PoE adapter has a PoE port and a LAN port, and only the PoE port supplies power.
Switch Master-slave Bridge
Point wireless bridge switches the master and slave bridges through the A-B button, A represents the master bridge, and B represents the slave bridge. In point-to-multipoint, take one of the bridges as A, and the other bridges as B, and then set them to the same pairing character to complete the point-to-multipoint pairing.
Easy Installation
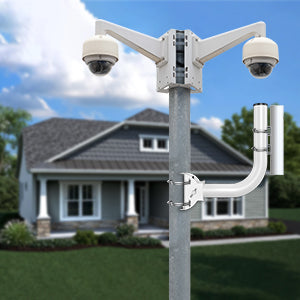
You can fix the point-to-point bridge on the bracket (ASIN: B09NLLG8MZ) with metal ties, or you can hang it on the wall; 2 wireless bridges are installed face to face as much as possible, with a clear view. It is recommended to purchase the UeeVii Universal Bridge Bracket.


